

How to Customize a Large Acrylic Pet House
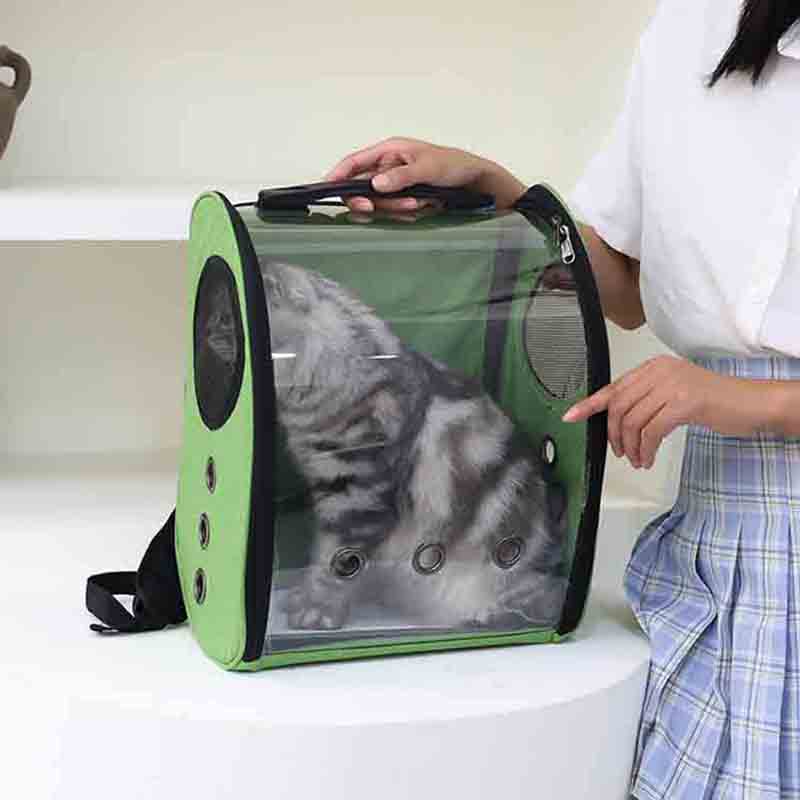
Creating a customized large acrylic pet house can be an exciting and rewarding project for pet owners who want to provide their furry friends with a comfortable and stylish living space. Acrylic pet houses offer transparency, durability, and easy maintenance, making them an excellent choice for pet habitats. In this guide, we will explore the steps to customize an acrylic pet house, considering factors such as design, functionality, and aesthetics.
Step 1: Plan Your Design
Before diving into the customization process, take some time to plan your design. Consider the following aspects:
Pet Size and Type: The design should cater to the specific needs and size of your pet. Larger pets like dogs may require more spacious areas, while smaller animals like cats or rabbits might need less space but more vertical areas for climbing.
Space Availability: Assess the area where you plan to place the pet house. Ensure that your design fits comfortably within the available space, with adequate ventilation and access.
Functionality: Decide on the features you want to include. Do you want shelves for climbing, a window for ventilation, or a removable roof for easy cleaning? Establish a list of functional needs based on your pet’s behavior and preferences.
Theme and Aesthetics: Choose a style that complements your home décor. Whether a modern, sleek look or a cozy, rustic vibe, your pet’s house will become part of your living space.
Step 2: Gather Materials
Once you have a clear design in mind, it’s time to gather materials. For a large acrylic pet house, you will need:
Acrylic Sheets: Choose high-quality acrylic sheets that are durable and shatter-resistant. Typical thickness ranges between 1/4 inch and 1/2 inch depending on the size of your house.
Acrylic Adhesive: Use a strong adhesive specifically designed for acrylic to ensure a long-lasting bond.
Tools: Gather the necessary tools, including a saw for cutting the acrylic sheets, a drill for making holes, sandpaper for smoothing edges, and a measuring tape for accuracy.
Paint or Vinyl: If you want to add color or patterns to the pet house, consider using acrylic paint or adhesive vinyl. Ensure they are pet-safe.
Accessories: Depending on your customization plans, you may want to buy additional accessories like ramp steps, cozy bedding, or decorative elements.
Step 3: Construct the Base Frame
Start constructing the base frame of the pet house. This is a crucial step that will determine the stability and overall shape of the house.
Measure and Cut: Using your design as a guide, measure and cut acrylic sheets into the appropriate dimensions for the base, walls, floor, and roof.
Assembly: Begin assembling the frame by gluing the walls to the base. Apply the acrylic adhesive generously to ensure a strong bond. Hold each piece in place until the adhesive sets.
Ventilation: If your design includes windows or ventilation panels, cut these openings in the appropriate walls before assembly. You can cover these with mesh to keep pests out while ensuring airflow.
Step 4: Add Functional Features
Consider adding functional features that enhance your pet’s comfort and enjoyment.
Shelves and Ramps: If you have a climbing pet like a cat, integrate shelves or ramps into the design. Cut the acrylic sheets to the desired size and secure them using brackets or adhesive.
Access Points: Ensure there are adequate entry and exit points. You can create a large front door or side door for easy access, and consider adding a smaller flap for pets to enter and exit comfortably.
Cushioned Area: Create a cozy area within the house by adding pet-friendly bedding or soft fabric cushions. Ensure they are washable and easy to replace.
Step 5: Decorative Touches
Personalizing the design with decorative touches can make the house feel more like home for your pet.
Painting and Patterns: Use pet-safe acrylic paint to add color or patterns to the exterior of the house. You can create stripes, paw prints, or any designs you like.
Custom Labels: If you have multiple pets, consider adding labels with their names on the house. This can be done using adhesive vinyl or by painting.
Decoration: Add fun decorations like hanging toys, scratching posts for cats, or a small flower box for aesthetic appeal. Ensure that any decorations are safe and secure, minimizing the risk of choking hazards.
Step 6: Final Assembly
After you’ve added all functional and decorative elements, it’s time for final assembly and finishing touches.
Secure the Roof: If your design includes a removable roof for cleaning, make sure it fits securely. Otherwise, glue it in place.
Finish Edges: Use sandpaper to smooth any sharp edges to prevent injuries to your pet. This step is crucial, particularly around entry points and windows.
Cleaning: Clean the entire house using a pet-safe cleaner. Remove any dust or debris, ensuring it’s ready for your pet to move in.
Step 7: Introducing Your Pet
With the pet house completed, it’s time to introduce your pet to its new home.
Familiarization: Encourage your pet to explore the house by placing treats or toys inside. Allow them to enter at their own pace.
Observation: Watch your pet as they interact with the new space. Ensure they feel comfortable and happy in their new environment.
Adjustments: Be open to making further adjustments based on your pet’s behavior. If they prefer a particular spot or feature, consider incorporating more of that into their living space.
Maintenance Tips
Regular Cleaning: Keep the house clean by regularly removing bedding and using a vacuum or damp cloth to clean surfaces.
Check for Wear: Periodically inspect the integrity of the acrylic and any functional elements like shelves or ramps. Tighten screws or reapply adhesive as necessary.
Monitor Your Pet’s Behavior: Keep an eye on how your pet uses their house. If you notice any signs of stress or discomfort, consider making further adjustments to improve their experience.
Conclusion
Customizing a large acrylic pet house allows pet owners to create a unique and comfortable sanctuary for their pets. By planning the design, gathering materials, and adding functional and decorative features, you can build a beautiful and practical living space tailored to your pet’s needs. With a little creativity and effort, you’ll provide your furry friend with a stylish and welcoming home that they will love.